
透過浮雕圖層功能建構 3D 浮雕
To help you design your intricate relief artwork, you can use our Patent Pending relief layer system. ArtCAM's relief layer system allows you to create individual elements of your 3D model on different layers. You then not only have the ability to easily edit each layer independently, but also the ability to dynamically change the relationship between each layer. For example, you can add a new relief layer onto the height of another or merge it high or low, you can even remove it. This allows you to create and manage a range of different 3D designs within one model file.
使用內建免費浮雕資料庫建立浮雕

But let's say that you have created a complex design on only one relief layer and you have made a mistake. Rather than having to recreate your relief artwork, this is where ArtCAM's new Free Relief Modelling Process is invaluable as you can amend existing designs; add to them or creating new ones. It allows you to free-up individual or multiple areas of your 3D design so that they can then be deleted, copied, rotated, scaled or put onto separate relief layers for example.
By drawing a vector around the area you want to alter you can cut it out with the Cookie Cutter tool. This will automatically create it as a free piece of "Free" clipart that you can alter, copy and paste as you please.
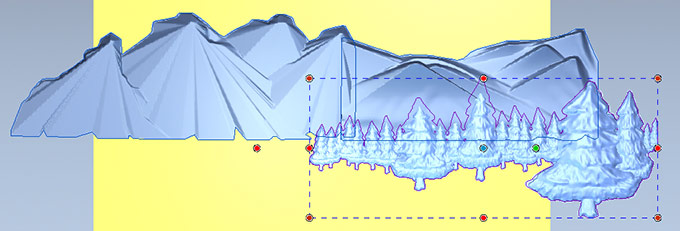
To see how this can be used to create a completely new design, see how we designed our landscape scene.
結合多種 3D 模型供複雜專案使用
If you need to model something needing several components or parts, ArtCAM's assembly modelling within the ArtCAM Project tree is ideal. ArtCAM's assembly modelling allows you to assemble a 3D model of the entire piece by combining the data (triangle meshes) of a number of 3D models.
This allows you to not only visualise how the final piece will look with all the models combined but also allows you to position and manipulate them in the 3D view by copying, mirroring, rotating, scaling and nudging the individual models or assemblies into place. To aid the design process the individual assemblies can be shown or hidden at any time. If you are unhappy with something simply click on the associated 3D model in the project tree and modify it as required.
透過免費浮雕資料庫來建立一幅山水畫浮雕
This design can be created in just minutes thanks to ArtCAM Pro's unique features including the Free Relief Modelling Process.
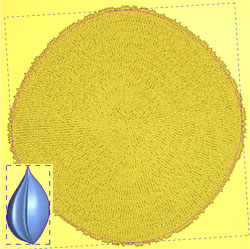
建立太陽花種子
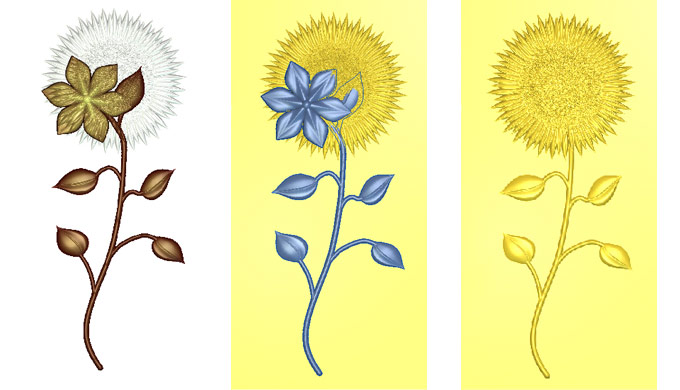
We started by creating the basic sunflower centre using the new 3D Node Editing. We then chose a leaf from over 500 pieces of free relief clipart in ArtCAM's clipart library.
Thanks to the new Free Relief Modelling Process, we did not have to paste this down in a specific place on the 3D model. We kept it "Free" to move around and manipulate. Anything that is blue has the freedom to move, with this process.
Then we used the New Texture Flow tool to create the seeds in the centre of the flower using the same piece of clipart. We chose what part of the ArtCAM model it filled, how big the seeds were and how they moved or filled the centre of the flower.
建立太陽花葉子
Using the same piece of clipart and the new Transform tool in the 3D view, we moved, rotated around a point and duplicated the leaf. Single or multiple leaves were copied and dragged around the sunflower to create multiple copies.

To resize the whole flower head we wanted to take the pasted down centre of the flower and make it "Free" to move. To do this we used the Cookie Cutter tool. This cut out the entire seed section of the ArtCAM model. We then resized the complete flower head, just as we had done before and pasted the clipart down on the relief.
建立莖幹
To make the stem we altered a flower from the Clipart Library and resized and rotated it using the Transform tool. We pasted this "Free" piece of clipart down onto a new relief layer, thanks to ArtCAM's patent pending relief layer system. This allows us to visualise and modify each layer separately.
We wanted to remove the top of the flower with the stem. To help us with this we used the interactive 3D Greyscale to see how the active and inactive layers interacted. We then used the Erase sculpting tool to remove it, safe in the knowledge that any mistakes made could easily be rectified with the Revert and Undo functions. Afterwards we merged our relief layers to make one relief layer.
So that we could re-use our sunflower for other designs, we dragged and dropped the finished relief into the clipart library.
將太陽花複製多朵
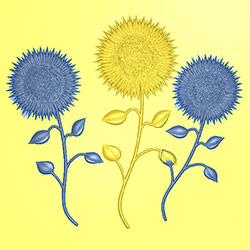
To create an ArtCAM model with multiple sunflowers we simply dragged the clipart from the Clipart Library onto the 3D model a couple of times. We could then position these freely manipulate-able pieces of relief clipart until we were happy with the layout and pasted them down.
編輯莖幹及葉子
To prevent the leaves from overlapping, we used the interactive Greyscale tool again. We drew around the unwanted area with the new Vector Polyline tool and then Cookie Cut this section out and turned it into clipart. Once repositioned, we merged it with the relief layer and did the same again for the other leaf. We then repeated this process to the other relief layer so that it would not overlap.
Et viola, our new ArtCAM model which we saved in the Clipart Library so we could use it again!